Monday, 25 October 2021

Autumn Update!

Well I have been doing bits on the bike on and off throughout summer and making steady progress, but not been updating the blog as it's been a bit "bitty", so I thought it was time to update.

Most of the work I've been doing has been painting. It really is remarkably cheap when you go down the hand-painting route compared to powder coating everything. The finish is not quite as good, but is "good enough" for what I want and in some ways more honest to the way the bike would have been "in it's time".

So far I have used a tin of Halfords Red Lead Primer; a tin and a half of Black Enamel, a tin of spray primer and 2 tins of spray black plasticote. Total outlay about £40.

These are the main bits that have been brush enamelled.


And some before and after of the sprayed parts.


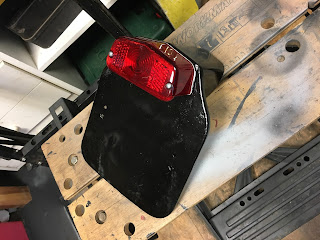
I'm pretty pleased with how the back light has turned out, considering it's very poor state - looks pretty good with the new light fitting mounted.


The other main thing I have done is to restore the seat. The base was in good condition and just needed preparing and painting. I got a new cover from Hitchcock's but the original foam was completely beyond saving. It did prove useful as a pattern though.


The new cover has the correct white piping.


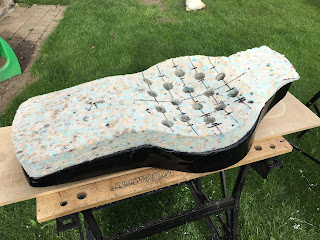
I ordered some new foam for the base from the very helpful people at GB Foam Direct. They suggested some high density as a base, topped and surrounded with medium density. I used the seat base as a pattern, allowing a little leeway for the very heavily contoured shape. You can see in the photos that there is a pronounced dip to create the rider's part of the saddle.

I roughed the shape out with a breadknife but actually found my bandsaw to be pretty good at cutting foam.


The original foam had a series of holes in it to create some "give" in the high density foam. I repeated this but not quite as many and I also restricted it to the bowl section. I'm not planning on taking pillions! I used a hole saw to do this and it worked ok but did tear out a bit as it came through the back.


I glued the foam to the base with spray contact adhesive and then wrapped the side of the foam and metal base with 5mm thick medium density foam, again using the spray adhesive.


Then I cut and glued the 25mm thick medium density foam cover.


You can see the finished "bowl" here.


Then time to put the cover on. I've probably done 4 or 5 of these over the years, but nothing nearly so complicated as this before. The combination of the contoured seat, non-rectangular shape and the piping really made it a challenge! I did it "dry" using heavy duty pegs to hold it in position until I was happy with how it looked and then gradually replaced the pegs with the sprung metal clips and self-tappers. Leaving the cover in hot sun for half an hour before I started made it a lot easier to work with.


Overall I'm pretty pleased with the end result.


Monday, 19 July 2021

Rear Light Refurbishment

 The original rear light mounting has been comprehensively butchered by a previous owner to fit a non-standard Triumph pattern rear light. The light fitting itself is broken so I needed to replace that and thought I would try and get it back to looking original. A new pattern light unit was available from Hitchcock's.

The first picture shows the "wrong" rear light fitting and the next couple after I'd stripped the mounting down and tried to batter it into something resembling a flat piece of metal. You can see where the top part of the mounting plate has been hacked off.


The plan of attack was to fashion a new piece of metal to restore the original profile and then epoxy that to the original (ideally I'd weld it but I figure that the light is going to bolt through both plates and hold it together anyway, so saving some expense.) If this doesn't work, longer term I'll fashion a complete new mounting plate, as this has actually been a relatively easy repair.

I cut two pieces of plywood and the steel to the angled profile of the top of the plate and sandwiched the steel between the ply in the vice, with about 5mm protruding. Then I gently hammered over the edge to form the lip. Amazingly it followed the profile really nicely  - I was expecting it to buckle a bit at the angle.

I cut the "bad" steel back and formed a bit of a rebate in the lip so that the existing pieces sat under the new, then I epoxied it all together, clamping it while the epoxy set. 

I'm pretty pleased with the end result for a couple of quid's worth of steel and a couple of hours. It still needs a bit of fettling before painting but will do the job nicely.


Frame Repainting

I've been putting off doing the frame because I knew it would be a horrible, dirty job stripping the old paint off. But I had a pretty free day today; it was sunny and there was no-one home to disturb with the power drill going for a while, so I decided to go for it today. I was right - it was a horrible, dirty job. But a couple of hours and 2 rust stripping wheels had it all removed.

The new bushes have now been pressed into the swinging arm, so that was back and I had already stripped that before it went to be worked on. 


Next job was to get a couple of coats of red lead primer brushed on ready for the enamel. I love days like today - a few hours work has taken me from grimy frame to nicely prepped and ready for the top coat on the next free day.


Monday, 17 May 2021

Swinging Arm Refurbishment

The swinging arm was reluctant to leave it's resting place for the last 60 years - see previous post. Paul had pressed out the seized in axle and inner parts of the bushes, but we'd held on at that point, until I found out what I could get to replace them.

Hitchcock's came up with the bushes, although they were listed as a Continental GT part, but are definitely the right thing. I spent half an hour with a paint stripping wheel before delivering back to Paul to get the remains of the old bushes pressed out and the new bushes pressed in.


New bush, and you can see the remains of the outer bush still in place.


Paint stripping

Paint stripping is the theme of this next phase I think.

I collected the parts that had gone to Paul for blasting today and really pleased with the results.

This was the box as delivered to him:


and these are the parts after blasting:

Engine mounts

Steering yoke

Brake pedal

Toolbox

Toolbox

Toolbox cover

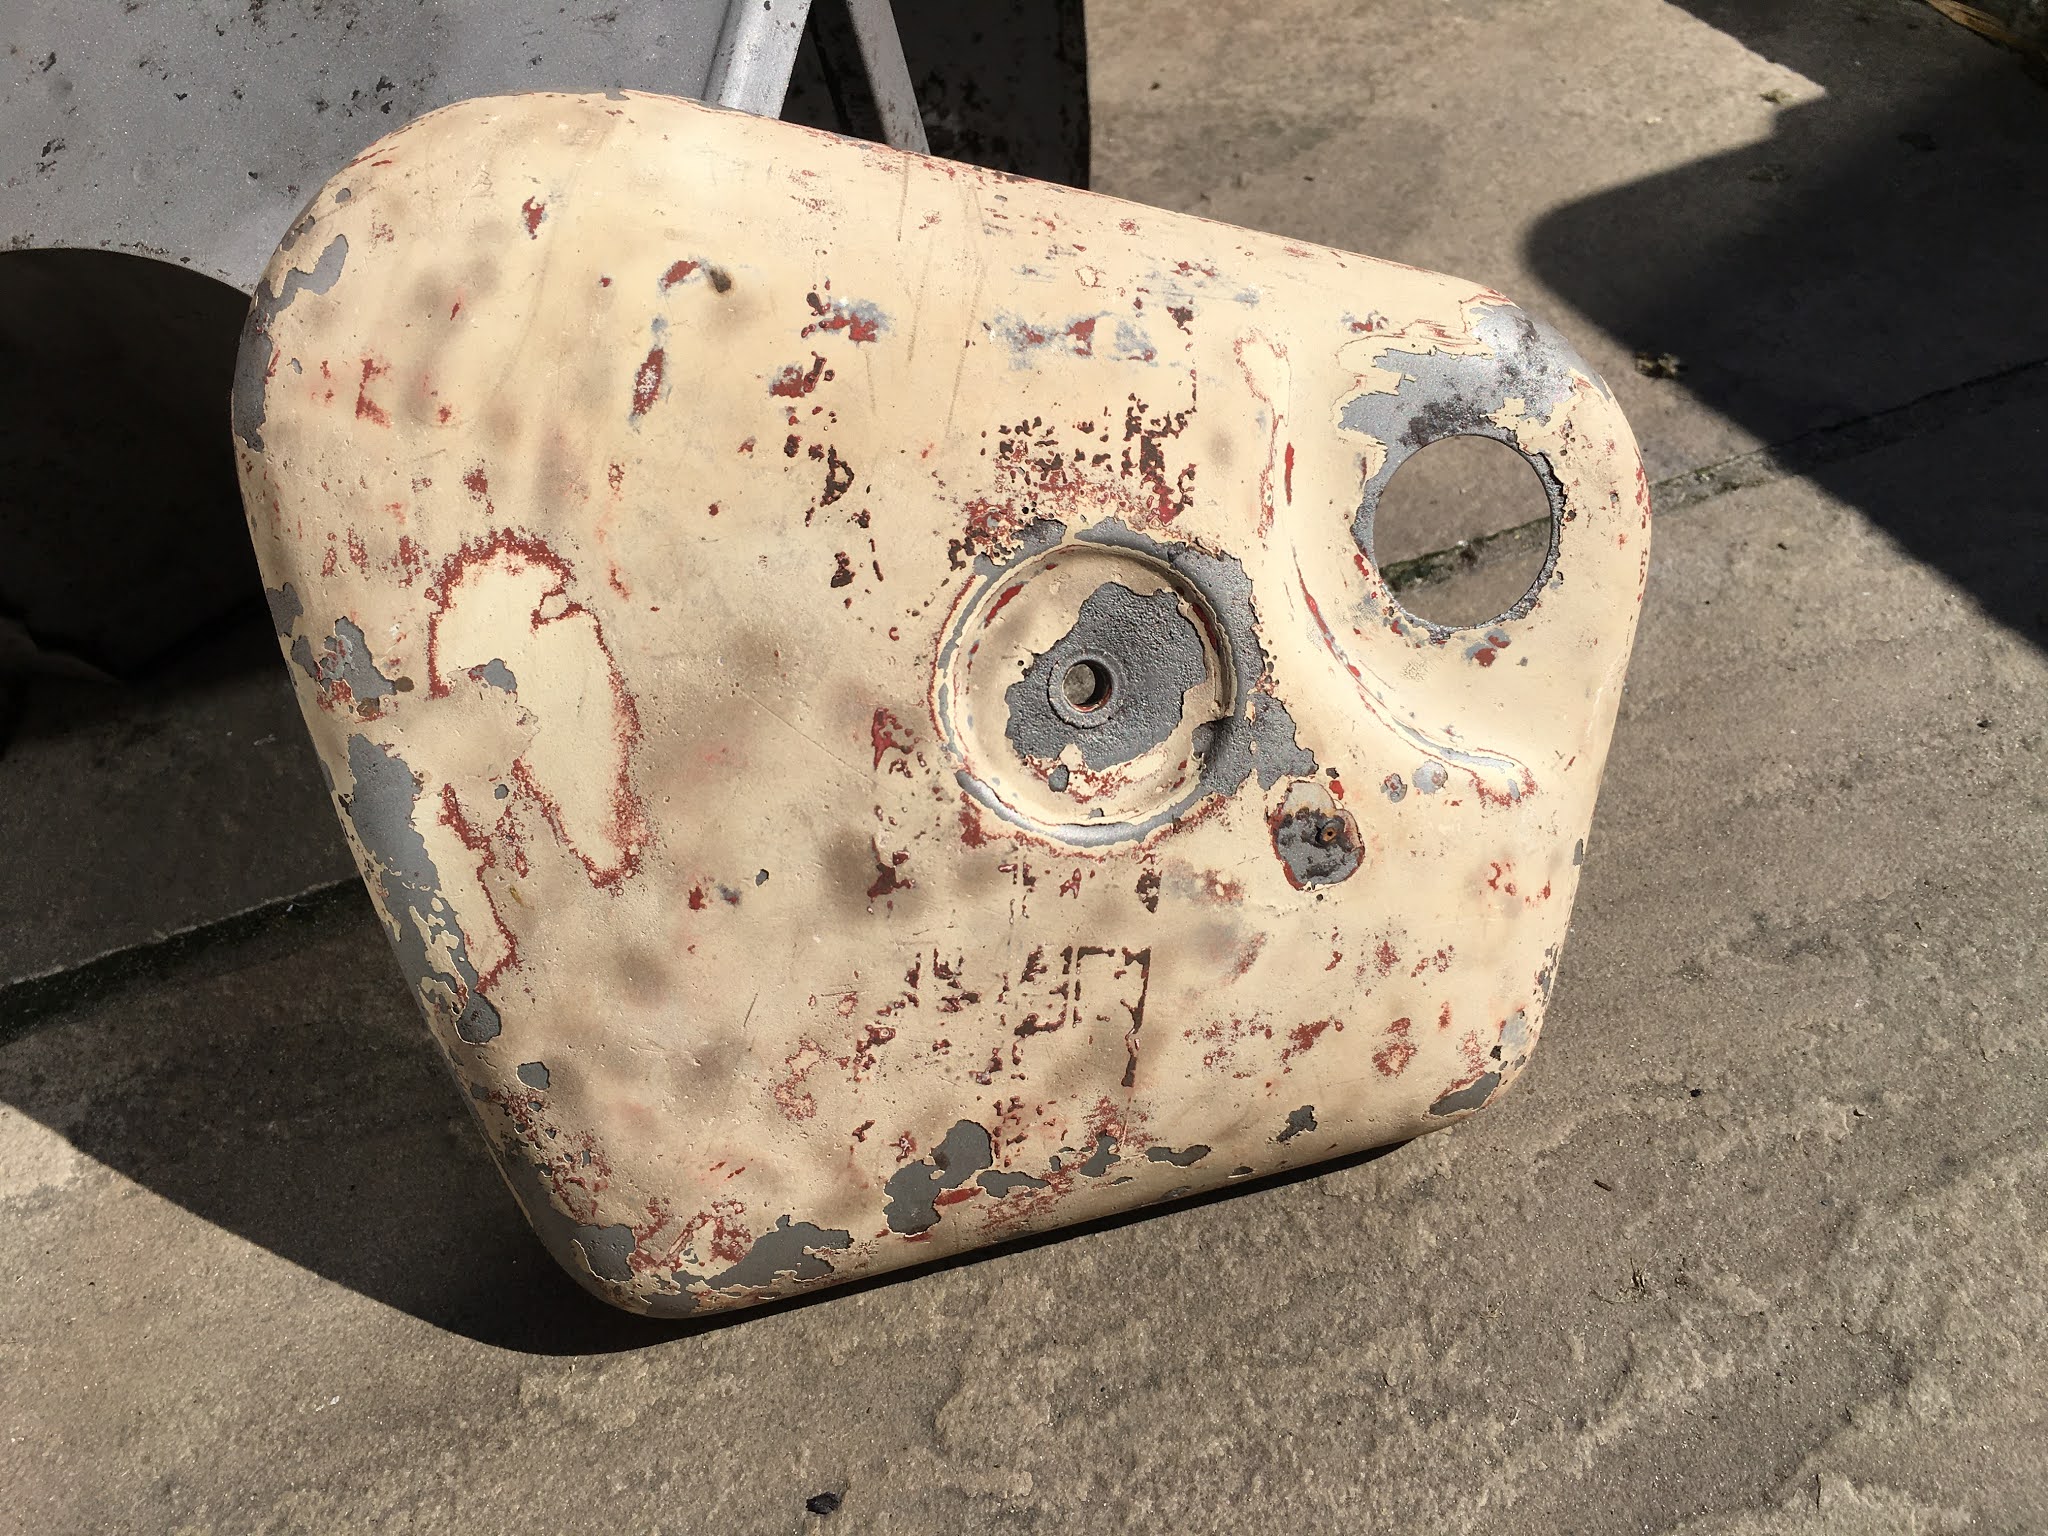
Toolbox cover - this one has been painted with something tenacious! More work to do here.

Chainguard

Front mudguard stays

Fork shrouds

So I can get painting that lot now. All in black except for the chainguard and tool box covers, which will be green. I'm planning on using plasticote black spray paint as I've had good results with that in the past.

I also started stripping some frame parts myself: the swinging arm (see next post) and the rear mudguard frame:


It comes off relatively easily with a paint stripping wheel in the drill, but it's pretty noisy so I'm doing it in small bursts to keep the relationship with our neighbours intact!

Monday, 10 May 2021

A change of direction then...

Now that there has been a sensible decision about the direction of travel with the chrome etc, that has started a bit of a change of thought on a few other areas as well.

Firstly though, I've sent off various bits of "tinware" to my tame mechanic to have them sand-blasted, ready for painting. They all seem to be in good condition so I'm hoping that  these will come back needing minimal preparation before I can repaint them.


Carrying on the thinking about the chromework, and particularly around what I want to end up with from this project - i.e. ...

"..  a presentable old bike that I could happily roll up to a classic show on and display, safe in the knowledge it would never win a prize for best in show, but also that I won't be afraid to sling some camping gear on the back of and head off to the Classic TT or on a weekend camping trip"

... I've decided that I am not going to throw money at the bike where I don't need to and not going to get hung up in the pursuit of originality.

So decision 1 has been to hand paint the frame and swinging arm etc with black enamel, rather than get it powder-coated. I reckon that I can get a decent finish with a brush  and it will protect it just as well, if not better, after having heard quite a few horror stories of flaking powder coating. Plus, if it does chip I can just touch it up. That decision will save me over £100.

I was going to see if I could get the frame sand -blasted but it's too big for my mechanic's blasting cabinet and other local places are either too busy or won't take on non-commercial work. I decided that I was spending so much time chasing around trying to get this done; then having to drive some distance to deliver and collect etc, that I could just do it myself with a drill and stripping wheels! I don't particularly WANT to do it, as it's a bit of a messy horrible job, but I like that I am in control of it again and also again that there will be a lot more of "me" in the end result 🙂. I did some experimental stuff for a few minutes and it's coming up fine - I reckon if I set aside half a day I'll have it done. (Of course I am taking dust precautions - mask / outside etc - as it will probably be lead based paint.)

Before:

After: 


So, some other areas of "new approach" this weekend:

1) I had a go at cleaning up and polishing the headlamp rim and bezel. Rechromers wanted £60 for these and reproductions are available for about £30. My version below is about 50p worth of chrome polish and half an hour of my time and I have the benefit of retaining some '60's "patina".


2) I stripped the paint off the battered old number plate and tail lamp mounting and hammered out the worst of the bends and dents, ready for a repair to the top part, where it has previously been very clumsily hacked about to fit the "wrong" light unit. I've ordered a new light unit so that I can get the shape of the top of the mount right.


3) I was in two minds about refurbishing the old shock absorbers (see here). I realised that I was going to have to spend at least £40 on new bushes and chrome covers before I even started repainting etc, and they would still be 60 year old shocks which are, in reality, a wear item like brakes etc. I found some new Girling reproduction ones for £95 from NJB Shocks


 and was moving towards getting those, but then I came across  some "new, unused" Armstrong shocks on EBay which are for a Bullet 350 but will fit the Crusader as well. I got them for £35 🙂 - n
ot the original style, but they won't look out of place either.


4) And the final one this weekend was that I had changed the plan from rechroming the "ace-bar" handlebars (£75!) to buying some new "touring" ones (£36) and then found that Hitchcock's were selling some second hand bars from Bullets, which had been taken off new bikes, for £16. I will need to trim about 35mm off each end but then they will be a perfect replacement.


I'm feeling much happier about the way this is going now - like I've got a really solid plan of attack.

I also ordered new swing arm bushes and axle at the weekend. The old bushes will need pushing out with a press, so once they arrive and I've stripped the paint, I'll get Paul to push the old ones out and the new ones in.


Tuesday, 4 May 2021

To chrome or not to chrome, that is the question......?

I haven't done a blog about the aim of this restoration, but one thing I have learnt over the years is that it's important to have a clear vision of the end goal, otherwise you can't really set out the path to get there properly. 

One consequence of that can be a "light" restoration that ends up as a full on show-stopping finish and that was kind of where I got to with my previous Honda restoration. Not that it was a full on show-stopper, but I did go way way further and spent loads more money than intended, and when it was finished I was kind of scared to use it because it would undo the really nice finish!

So my thoughts for the Crusader have been that I wanted to end up with a presentable old bike that I could happily roll up to a classic show on and display, safe in the knowledge it would never win a prize for best in show, but also that I won't be afraid to sling some camping gear on the back of and head off to the Classic TT or on a weekend camping trip. 

I am not aiming for 100% originality. Anyone coming to me at a show and saying" I think you'll find that the 1962 Crusader used a Lucas xyt7 lens and not the earlier xyj4" will probably get a polite shove off.

I would like to reuse or repair rather than renew, although not where the economics of doing that are ridiculous. The bike is probably never going to be worth more than about £3000 maximum and I have spent just under £1000 on the purchase - £2000 isn't a lot once you start a project like this!

So, here's what my bike would have looked like when new:


My initial thoughts were to head for something like that, but within sensible economics. e.g. to refurbish my fuel tank, which currently looks something like this:


will cost upwards of £500, by the time dents are repaired, chrome is removed, polished and rechromed and then painted. That doesn't add significant value to my "vision" really. So I have decided that I will paint the tank, not rechrome it.

I got my pile of things that DO need rechroming together today and drove an hour to my nearest rechromers - except for the wheel rims, this was a similar pile to the last restoration I did, which cost me about £400.


Here's what I was quoted:

Wheel rims: £180 each - £360
Front Mudguard: £120
Rear Mudguard: £350
Handlebars: £75
Exhaust header: £75
Headlight bezels (2): £60

Grand total: £1,040!!

So the vision has been "refined". 

  • I can get new rims to the same pattern for about £100 each. (saving £160)
  • I'll get the exhaust header rechromed - they are £120 new, so better value.
  • I can get new reproduction headlamp bezels for £32. (saving £28)
  • I was only getting the handlebars done because they were the original "sports" ace bars. I can get some more comfortable "touring" bars new for £36. Not as original, but definitely kinder to my old back 😀. (saving £39)
  • If I am now not being faithful to the "sports" look, there was a contemporary model to the Crusader Sports called the Clipper with less chrome etc, so I'm going to de-rust the mudguards and repaint them with the tank. The majority of British bikes of the 50s and 60s were finished with painted mudguards and there are loads of Crusaders around like that. (saving about £400)
  • Tank is being repaired and painted instead of rechromed (saving about £450)
  • I'll try and recycle the old unused parts on EBay, rather than throw them away. 
In total, that will save me about £1,000 and the bike will look something like this:


instead of this:

Less bling, but I can live with that, and it will have more of "me" in it because I'll do the painting myself, seeing as I'm not aiming for a concours restoration.

Oh, and it won't be red. Almost every Crusader I see is red. I'm thinking a nice lawnmower dark green at the moment!