Well I have been doing bits on the bike on and off throughout summer and making steady progress, but not been updating the blog as it's been a bit "bitty", so I thought it was time to update.
Most of the work I've been doing has been painting. It really is remarkably cheap when you go down the hand-painting route compared to powder coating everything. The finish is not quite as good, but is "good enough" for what I want and in some ways more honest to the way the bike would have been "in it's time".
So far I have used a tin of Halfords Red Lead Primer; a tin and a half of Black Enamel, a tin of spray primer and 2 tins of spray black plasticote. Total outlay about £40.
These are the main bits that have been brush enamelled.
And some before and after of the sprayed parts.
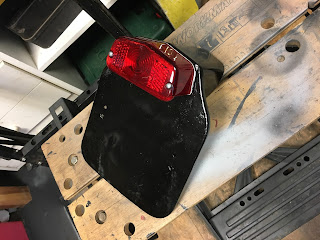
I'm pretty pleased with how the back light has turned out, considering it's very poor state - looks pretty good with the new light fitting mounted.
The other main thing I have done is to restore the seat. The base was in good condition and just needed preparing and painting. I got a new cover from Hitchcock's but the original foam was completely beyond saving. It did prove useful as a pattern though.
The new cover has the correct white piping.
I ordered some new foam for the base from the very helpful people at
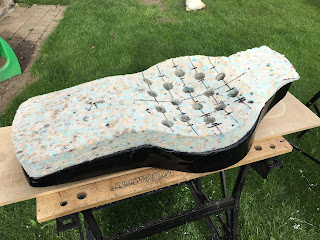
GB Foam Direct. They suggested some high density as a base, topped and surrounded with medium density. I used the seat base as a pattern, allowing a little leeway for the very heavily contoured shape. You can see in the photos that there is a pronounced dip to create the rider's part of the saddle.
I roughed the shape out with a breadknife but actually found my bandsaw to be pretty good at cutting foam.
The original foam had a series of holes in it to create some "give" in the high density foam. I repeated this but not quite as many and I also restricted it to the bowl section. I'm not planning on taking pillions! I used a hole saw to do this and it worked ok but did tear out a bit as it came through the back.
I glued the foam to the base with spray contact adhesive and then wrapped the side of the foam and metal base with 5mm thick medium density foam, again using the spray adhesive.
Then I cut and glued the 25mm thick medium density foam cover.
You can see the finished "bowl" here.
Then time to put the cover on. I've probably done 4 or 5 of these over the years, but nothing nearly so complicated as this before. The combination of the contoured seat, non-rectangular shape and the piping really made it a challenge! I did it "dry" using heavy duty pegs to hold it in position until I was happy with how it looked and then gradually replaced the pegs with the sprung metal clips and self-tappers. Leaving the cover in hot sun for half an hour before I started made it a lot easier to work with.
Overall I'm pretty pleased with the end result.


No comments:
Post a Comment