Saturday 8 July 2023

That's a wrap!

Now that the initial shakedown runs are done, I'm treating that as the end of the restoration and the start of the fettling and riding stage!

My future adventures on Anna P will be recorded on my Adventures on Two Wheels blog.

I have loved this restoration and I'm so proud of taking her from a rusting pile of bits that had lain unloved at the back of a garage for 40 years to an attractive and capable machine, albeit one that is 62 years old! I can't wait to get out on some camping/touring adventures with her and explore what she is really capable of. I've already got a trip across to the Isle of Man booked for a few days during Manx GP practice week.

My thoughts on the aim of the restoration from two years ago were:

"So my thoughts for the Crusader have been that I wanted to end up with a presentable old bike that I could happily roll up to a classic show on and display, safe in the knowledge it would never win a prize for best in show, but also that I won't be afraid to sling some camping gear on the back of and head off to the Classic TT or on a weekend camping trip. 

I am not aiming for 100% originality. Anyone coming to me at a show and saying" I think you'll find that the 1962 Crusader used a Lucas xyt7 lens and not the earlier xyj4" will probably get a polite shove off.

I would like to reuse or repair rather than renew, although not where the economics of doing that are ridiculous. The bike is probably never going to be worth more than about £3000 maximum and I have spent just under £1000 on the purchase - £2000 isn't a lot once you start a project like this!"

I reckon that I have pretty much achieved that objective. Another driver was that I had remembered my dad telling me that a Royal Enfield Constellation & sidecar was his last bike he had in the 50s, which seemed like a nice link as he died a couple of years ago. Well, this one's for you Dad x

You may wonder how much this all cost? I stopped counting the cost quite a while ago, but reckon it's probably around £3,000, including the initial purchase price. I did make a conscious decision at some point that I wasn't going to buy cheap parts and, particularly in the engine, most came from Hitchcock's to try and ensure a certain level of quality. A couple of parts (e.g. levers and throttle controls) came from autojumbles and I've probably been less happy with those. If I was doing it again I'd probably stand a couple of hundred pounds extra cost for better parts all round.

Maybe if I keep her for a few years she'll appreciate in value a bit and I'll have covered my costs, but this has never been about making money. I have thoroughly enjoyed the whole process, and the feeling of bringing her back to life has been priceless. 

So I'll leave it here with some before and after photos to summarise. 


Friday 7 July 2023

Final Fettling.

Although I had set up the electronic ignition strictly by the instructions, I could only get her running with the stator plate at the extreme “advanced” position, so I thought that it was fairly likely that the timing would benefit from being properly set up with a strobe timing light. This is another first for me - it sounded very complex and technical. As with most things, once I thought it through carefully and logically it all started to make sense.

 The timing light works by taking a signal from the spark plug as it fires and lights the strobe light instantaneously at that point. So if you put some marks on the ignition rotor, you can use that to see whereabouts the position of the piston is as the spark ignites - i.e. “the timing”.

The manual told me that at low revs the spark needed to happen at 5 degrees before the piston was at Top Dead Centre (TDC) on the compression stroke. For higher engine speeds, this needed to be at 30 degrees before TDC. 
So I removed the spark plug and used a piece of dowelling down the spark plug hole to determine when the piston was at TDC and marked a line across the rotor and onto the alternator stator surrounding it.

Then I got the old school compasses and protractor out and made a disc that showed lines at 0, -5 and -30 degrees. I also cut a hexagon out of the centre to mount it on the rotor.


Then I transferred these marks onto the rotor and stator with a fine permanent marker.


With the engine running. I could aim the timing light at these marks and then adjust the position of the electronic ignition pickup until the -5 line lined up with the mark on the stator. It proved to be a mile out - it was +5 rather than -5. So the spark plug wasn’t sparking until the piston was well past TDC. This would mean that the power and efficiency would be compromised. As I turned it to the correct position, the revs rose very noticeably, confirming the more efficient running.
As a final check, at high revs I could confirm that the ignition was being advanced to 30 deg before TDC. 

With everything bolted back together again, I went out for another ride, this time venturing further afield around the local lanes, although I guess I was never more than about 5 miles from home (still a long push if she broke down!)

She was noticeably easier to start and ran more smoothly. I put about another 25 miles under her wheels and we’re up to 55 miles without any big issues now, which is really great.

Another job I did today was to fit a new fuel tap, which also has a reserve facility, so that gives me a bit more comfort as well till I get used to how far she’ll go on a tank!


Thursday 6 July 2023

Shakedown runs

After a little fine tuning, we then started doing some shakedown laps of my local village. I have a test route of about a 2 mile lap, the first half of which is uphill, which means that if anything goes wrong halfway out I can pretty much coast back home! 

We did just over 10 miles without any big incident. Four main things to address: 

  • there is a bit of an oil leak from the valve cover, which should just need tightening a bit.
  • the gear change is a bit notchy, particularly going back into first from second. Some of this could be because the clutch is dragging slightly (the friction plates seem slightly too thick) but I'll check the selection adjustment as well.
  • the petrol tap seems to be leaking slightly. I'm going to swap it for one with a reserve on it as well anyway.
  • one of the indicators is loose!


I was very pleasantly surprised at how nicely she ran; how nimble handling and sprightly, especially considering I'm running in a new engine. She span up to 50 as easily as the Classic 350, although to be fair, she is quite a lot lighter. 

I couldn't have hoped for better from a shakedown, after a complete rebuild from essentially a box of bits, so there is just a bit of tweaking to do and I can start building some "confidence miles" locally and start running in the engine. I pulled the plug to see what that was like and it looked pretty good, considering I’m just running locally at low ish speeds.


I’ve fitted some period throw over panniers so I can carry plenty of tools with me if anything needs tweaking while I’m out 🙂.


A couple of days later I got another 20 miles running without any big dramas, so I'm feeling that I can gradually go a bit further afield now. I'm so impressed with how she runs - I have to remind myself that I'm running her in as she spins up so eagerly, but I'm not stressing her or slogging along in low gears so should be good.

The new petrol tap has arrived and I've recently got hold of a strobe timing light (another FB Marketplace bargain!), so I'm going to set the timing more accurately and fit the tap (to give me a reserve as well) before I go further.

I am booked in to display her at a local show in a fortnight, so the aim now is to get the confidence to stray 20 miles away from home!

But does she go?

Carburettor "tickled" to fill with fuel; kick engine over a few times to get some oil circulating; switch on and ...  


Woohoo! 

So the next question is "will she move?" Clutch in; select first gear; stall. Oh dear.

I had a severe case of clutch drag - i.e. not fully disengaging, which caused it to stall. I reset the adjustment as per the manual but without any improvement, so then stripped the clutch down, as I thought that maybe the plates were partly stuck together after being assembled but then not used for a year or so.


Everything came apart fine, but I did find that the plain metal plates still had quite a lot of pitting left on them. I had wire brushed off all of the corrosion before I assembled it last year (caused by 40 years of storage - see below) but this time I cleaned the plates up more thoroughly on the belt sander to get rid of all of the surface pitting.


After reassembling the clutch, most of the drag had gone. I think that there is a little bit remaining that is caused by the new friction plates being very slightly thicker than spec, which seems to be a common problem according to the forums. That should wear away fairly quickly in normal use I think.

Anyway, I put everything together; wheeled her out to the front of the house and...

...even bigger Woohoo! 

After a little tweaking of the air screw, I got a couple of spins around the block and everything pretty much worked as it should. Hard to believe after building her from a box of parts!


Final Assembly

This is probably the "biggest bang for the buck" stage, where the whole project comes together in a very short time.

Three "sub-assembies" were built up on the bench - the fuel tank with badges, tap, frame clip underneath and the original fuel cap, which is one of the parts that I have deliberately left with its small amounts of tarnish to reveal the original patina. 


Next, the rear mudguard could be built up onto the sub-frame, with the rear light assembly. I think that looks really lovely.


And, finally, the front mudguard with its stays and number plate was built up.


Then each of the sub-assemblies was added to the bike, together with the saddle. This part is so nerve-wracking; making sure not to scratch the new paint!

Gradually, Anna emerged in her full form!


Some "trinkets" were also added then: bar-end mirror, the Anna P lipstick autograph and my "Splendidness" gauge, which effectively disguises a very corroded head stem nut!


I really couldn't be happier with how she has turned out. I know that she isn't concours and that the purists will gripe about some elements, but she has so much of me in her that I really don't care! 

I particularly love this shot and also the following one showing the "view from the saddle".


And so, time to put some fuel in the tank and see if she still starts, before trying for a first ride....


Wednesday 5 July 2023

Why is my Crusader called Anna P?

This previous blog entry described using the Beugler Pinstriping Tool for applying the pinstripes onto the tank and mudguards and how I managed to find a second hand tool.

Well, I had neglected to bore  tell my wife about my lucky find and she was checking the bank account online the following day, when I heard "and just WHO is Anna Pinstripe? She sounds like a high class call girl!"

The transaction had been shortened as below :-) 


The bike rapidly became known as Anna Pinstripe after that, and subsequently got shortened to Anna P, hence the lipstick autograph on the headlight cowling!


Saturday 15 April 2023

Painting the Tinware 3 - Pinstriping and Decals

I thought it was time to have a good tidy out and clean up before starting to do the next part! 

Having dismantled my temporary spray painting booth, I could relocate Anna (minus her fancy tinware) into her new home. She's a lot safer in there and protected from damage.


It seems like such a long time since I've had this much space in the workshop! While I was at it, I cleaned and sanded down the workbench, which had got VERY grimy during the restoration, and treated it to a couple of coats of teak oil to protect it a bit. I also removed the vice temporarily to prevent the risk of any damage to parts if I'm working on the bench with them.


This all feels a lot nicer to work in ☺.


Now the scary business of doing the pinstriping could start! At the Stafford Show in 2022, I'd seen a demonstration of the Beugler Pinstriping Tool and had a go myself on the stand. It certainly seemed fairly straightforward to lay down nice even width curvy stripes on a piece of paper, but I was assuming that it would not be that straightforward when I came to doing it on a curvy chunk of metal. I was also unimpressed with the price of around £260 to get multiple width heads that I would need! But I was still driven to find a way to do it myself, as almost everything so far has been my own work.

I was veering towards either masking a stripe somehow or using vinyl tape, when I came across an old but hardly used Beugler kit on Facebook Marketplace. After a little haggling, I got it for £40 - much more like it. I figured that I can probably sell it on afterwards or keep it for future projects at that price. (Incidentally, this purchase was also the source of the Crusader being given the name "Anna P" - see https://recrusaderreborn.blogspot.com/2023/07/why-is-my-crusader-called-anna-p.html)

Enough of that! Of course, the salesman at the Stafford Show had made it look super easy, but once I had a practice on some paper, it kind of was. That's not to say that I didn't make any cock ups and the finished product is far from professional but fits easily into my "good enough" standard.

The tool is essentially a syringe with a knurled
wheel which picks up an even paint film

Straight lines were easy!

Curved lines more challenging - it
mostly came down to confidence!
Here's how I did it.

First I flatted back all of the paintwork to get an even matt finish. This ensured good paint adhesion, but was also in readiness for ultimately clear coating the paint. The tank is part way through being done here.


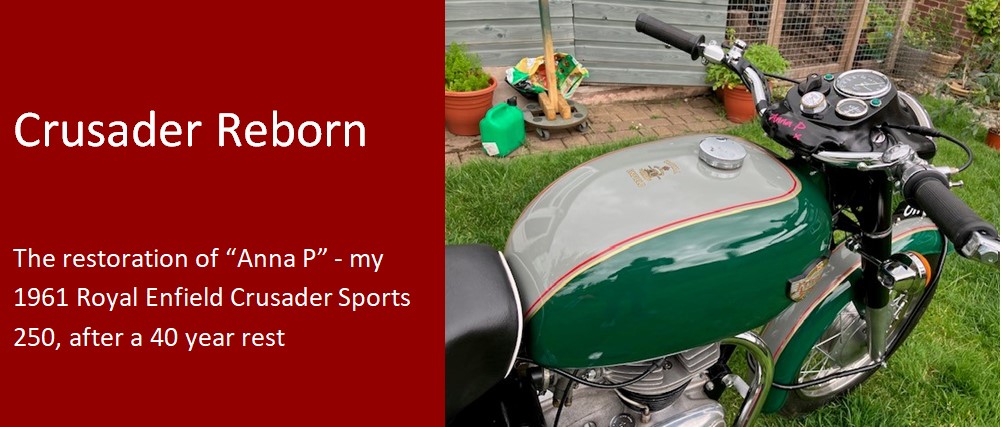
The pinstripes were going to be a roughly 2mm wide gold one, sitting against the green/grey boundary line, and then a slightly narrower red one sitting about 2mm inside that. I wanted to set a line of tape that I could use not to mask but as a guide edge for both the stripes.

So I got some 2mm wide masking tape and stuck that down as smoothly as possible in the position that would ultimately be where the gold stripe would go. ("A" in photo below.)

Then I ran another line of tape inside and just touching that one ("B" in photo below.)


Removing the original line of tape ("C" below) left me with a guide line parallel to the green/grey border and this became my guide line.


I also stuck a small piece of masking tape at the ends of the stripes to give a clean break.
This photo shows the first gold stripe which I really used the green/grey paint junction as the guide line for in practice.

The curves on the tank were easier than expected actually.


After allowing a day for the gold stripes to dry, I did the red. I found the red harder for some reason - I think because I was trying hard to keep the lines parallel - so it didn't feel as natural or smooth as when doing the gold. I had to stop at a couple of points and wipe off what I'd done with white spirit, then start again. I did the mudguards first so that any mistakes would be on less obvious areas. This was a good move!


By the time I came to the tank, I had probably relaxed a little and managed that in a single pass.


Once it was all finished, there were a few places where I hadn't quite kept the wheel flush to the surface which causes the width of the stripe to vary. I went back and carefully locally masked up the missing edges; then filled in with a thin modelling brush while the paint was still wet and it all blended in seamlessly.

After giving the stripes a day or two to dry, I cleaned down the tank and rear mudguard again, ready to apply the decals. This was just like doing an Airfix kit with waterslide transfers, the key being to make sure you squeegee out any air and water from under them.


I then left everything to thoroughly dry for a week or so, to ensure any remaining solvents etc had properly evaporated. I used aerosol 2-pack lacquer to clear coat the paintwork, which is supposed to be fuel resistant. 

First I applied a very light "dust coat" to seal everything, followed by about 3 full coats, which really brought everything to life.

All in all, I was delighted with the results. There are bits all over that I could criticise, but I am so happy that I managed to do it myself.


And I LOVE the colour scheme. Right at the outset, I'd decided that I wasn't going to paint her red, like almost every other Crusader out there, and had a vision of a "lawnmower green" that I wanted. That was actually after seeing a gorgeous Vincent in one of the classic bike magazines.  I've been really unsure about using the grey as an accent, but it sort of seemed appropriate and I love it once the gold and red stripes are there to differentiate everything.

I am certain that this didn't influence my colour choice, but when I got the tank badges out again, I found that I couldn't have co-ordinated it better if I'd tried!!