At last, time to start putting things back together again!
In readiness for the frame rebuild I polished up the fork sliders, using the same process as the hubs - successively finer grades of Scothbrite pads followed by successively finer wet and dry paper and then Solvol polish. They came up really nicely.
The first photo shows before and after of the two legs. This was also really the point where I started the degreasing and cleaning up of the multitude of nuts, bolts and studs using a wire brush attachment in the pillar drill. Where possible, I'm trying to reuse as many of the fixings as I can, not only to save money, but because I think it will end up more in keeping as a whole look. Remember this is a bike to be used, not a museum piece.
I also cleaned up the various fittings for the headset bearings and the fork shrouds. The bearing races look in pretty good condition. I replaced the ball bearings, but again didn't get sucked in to automatically upgrading to taper roller bearings. I may do that in the future, but only if I find the original set-up lacking.
With the bearing races tapped back into the frame, it feels like the rebuild has commenced!
In swift succession, the swinging arm (complete with new bushes) was installed and then the new Armstrong shock absorbers fitted. These aren't exactly the same as would have been fitted originally, as they have exposed springs, but also aren't out of character with the bike and were way cheaper, as they were second hand but unused.
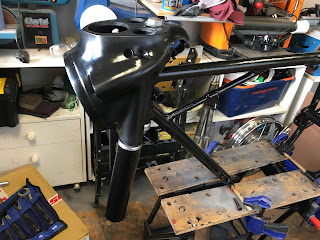
You can see my very makeshift, but surprisingly effective, workstand here with the frame clamped onto my Workmate!
Next up was to install the head bearings, stem and headlight nacelle...
A quick aside here. When I painted the black bits, I used Plasticote for the nacelle and Halfords Spray Enamel for the fork shrouds. I reall wasn't very happy with the finish on the nacelle - it just didn't have the same deep gloss as the shrouds. After a few days of agonising, I decided that I wouldn't grow to like it any more as time went by, so I dismantled the front end again and gave the nacelle a few extra top coats of the gloss enamel. It looks much better now ☺.
Next up was the toolbox:


No comments:
Post a Comment